Thursday, December 30, 2010

A Snowy Friend

I hope everyone had a nice Christmas, we sure did. We were spoiled by Santa and Family.
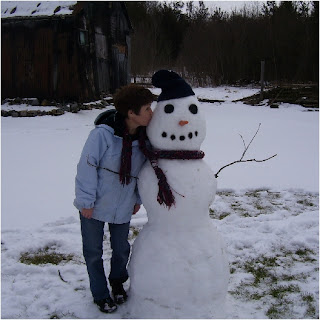
Today was really nice out temperature wise so we bundled up and went outside for some winter fun. Something about snowmen just make me smile so hubs and I rolled the snow and made this guy in a very short time. We used one of his touques, paint can tops for his eyes, my scarf, a carrot nose and black acryllic paint for his mouth. I didn't realize you could paint snow but as soon as the paint hit the snow it took it very easily. Our cat Rosie even ventured out on the steps and sniffed under the deck although she didn't last long, She is a woosy when it comes to getting feet wet or anything different on her paws.
A good day was had by all. The temperature was 40 degrees F so it was a good day to get some fresh air and get rid of the cooped up cob webs in the head.
Thanks for dropping by and I hope you have a wonderful New Year.
Remember don't drink and drive, always have a designated driver.

Friday, December 24, 2010

Away in a Manger


AWAY IN A MANGER

 
no crib for His bed,

The little Lord Jesus

lay down his sweet head.

The stars in the sky

looked down where He lay

The little Lord Jesus,

asleep on the hay.


The cattle are lowing,

the poor Baby wakes,

But little Lord Jesus,

no crying He makes;

I love Thee, Lord Jesus,

look down from the sky

And stay by my cradle

till morning is nigh.


Be near me, Lord Jesus,

I ask Thee to stay,

Close by me forever,

and love me, I pray!

Bless all the dear children

in Thy tender care

And take us to heaven,

to Live with Thee there.


May you find peace and joy this holiday season.

I want to thank all of you who visit my blog .
Wishing you a Happy New Year too!
~L~

Monday, December 20, 2010

Remind me never to take up

Scrapbooking......I made a gift for my dear hubby and well it must have been the longest project I have ever made with paper.
I first had the idea last year for Christmas when he had turned 50 and we had been to a Maple Leafs Hockey game in Toronto on the actual day of his 50th. We had a nice dinner went to the game, took pics etc. Last fall before Christmas I had computer issues so my pictures were still on the old hard drive and I panicked because I couldn't get the pics off to do this project. So......I finally did manage to get the pics off and put them on disc and so this year I made what I wanted to last year.
I bought a 12x12 acrylic frame from my local scrapbook store and bought a 12x12 sheet of Toronto Maple Leaf official NHL paper. I kept our tickets all that time as well, and.... a sparkly part of a 50, I think the 0 part is what I had and located the 5 with much thought on how do I get it or find it without hubs knowing what I am doing.  Retrieved that, ok onto the project.
Well after fiddling, resizing pictures, placing this and that here and there I fianlly got it all laid out. No problem, must have taken me an hour just to sit and stare at things, is this supposed to happen when scrapbooking, a blank look of what do I do next or what am I supposed to do???? hmmmm how come this is becoming harder than it is supposed to be. Well after moving and cutting and placing then pushing things aside and almost giving in I just took off a few things, cut out a few flourishes from my Tim Holtz alterations Flourish Die and just went for it I finally got it all placed on the page. Now what and how do I keep things there where I want them so they won't move and will still fit? This is becoming way to difficult for a piece of 12x12 paper.  I carefully lifted pieces and put adhesive where I needed to and placed things behind things and over top of things and finally it was done. How long did that take me?.........3 hours, are your kidding me? I could have made a dozen cards or made some ATC's or cleaned the house.
Well at any rate I would show you all but it is wrapped up and I can't say it is probably a scrapbookers dream layout page but it will do and we had a great time and I hope JB likes it. It is placed safely in it's acrylic frame and will be either hung up or placed on a picture stand but that is it for me. I don't think scrapbooking is going to be something I will want to do anytime soon. Too much work, stress and running back and forth for supplies and many inquiries as to " what are you doing in there anyways"?
Do you have any projects or things that you run into during this holiday season that takes up way more time than you expected? Even wrapping presents is more enjoyable than this was. ACK, he better like it. LOL
Til next post, stay warm, safe, keep your wits about you and remember Tis the Season to be Jolly...falalalala

Wednesday, December 15, 2010

Winners of the 12 Tags of Christmas

Drum roll please.........
Lynn has commented on every tag and has won the 12 tags for first place and Sharon has won 2nd place missing the 12th tag.
Ladies congratulations and please email me with Winner in the subject line. You can contact me by clicking Email on the right hand side bar.
If I do not hear from you by Friday 17th of December I will pick another winnner in your place.

I have really enjoyed making tags and I can tell you they look really nice attached to gifts as I have done a few today.

Merry Christmas everyone and a Very Happy and Creative New Year.
L

Tuesday, December 14, 2010

Lesley's 12 Tags of Christmas-#12

And yes it is the final tag and can't believe how quickly time is flying.

I am so happy that a few of you have continued with me on my creative journey and I hope you have enjoyed it as much as I have.

On this last tag I would like to remind you that the first place prize is ALL 12 tags and....2nd prize is a goody package of stuff to make your own tags.
So.....final item.....when you post for my last tag, tell me what you have enjoyed the most of this presentation on my take and why you want these 12 tags.
A few of you have followed me all the way through and I am so grateful for your lovely comments.
So here is the final tag and I hope you have a HOHOHO Merry Christmas.

This tag I used  Basic Grey 2 sided scrapbook paper, I used a Tim Holtz Santa Stamp and stamped it on ivory coloured CS. I then trimmed the stamp to fit behind this chipboard frame from my stash. I dabbed Fired Brick DI on the frame and really liked the hit and miss it created on the frame instead of the frame being coloured in solid. I used Jumbo Java ink to ink around and into the stamped image and coloured the holly and berries and Santa's face with some pencil crayons before I place the frame on. I also put a tiny hole in the bottom right of the frame to feed my thin wire through that I had the jingle bells attached to. I also stamped in black very lightly all around the frame with HoHoHo. I then used 2 sided tape and place the Santa image onto the back and just pressed the bit of wire from the bells onto the tape to hold it in place. Then I placed it on the tag that was previously inked with Jumbo Java and a tiny bit of Fired Brick DI.

I then cut out of fun foam my numbers and painted them with Candy Bar Brown acrylic paint. I stamped a flourish in Jumbo Java and then applied distress embossing powder, embossed then rubbed the release crystals off. And that was it. I just have to find a ribbon or paint some gauze for a hanger.
Again all tags will have a hanger or ribbon on them, this is my last one that requires one.
So remember to comment and tomorrow I will be picking 2 lucky winners.
Thanks for dropping by and remember to keep the Christ in Christmas.


Monday, December 13, 2010

12 Tags of Christmas delay

Hey there bloggers. Boy was I so excited to show this last tag but unfortunately Blogger is not co-operating at the moment so please stand by and when I can upload my pic I will.
Thanks so much.
L

Sunday, December 12, 2010

12 Tags of Christmas-tag 11

Well winding down fast now, wow I just seem to get a tag done and time to do another one already.
I have to say I have been peeking over at Tim Holtz's blog and said wow to his Tag #10. So today I got out my snowflake embossing folder, some acetate and my CB and cut a tag shape out first then ran it through the CB. I thought it might end up shrinking the acetate a little but it did not so I ended up with the size I started out with. I am new to the Cuttlebug and I am learning so much online from other blogs and peeps who have them. I can't believe the stuff you can do and make with this great little aparatus.
Back to the tag.... I recently got some things to make greeting cards from a retailer not far from my home called Ectasy crafts, they sell a lot of Dutch card making supplies and I got some precut sheets that you just punch out and layer it all on paper. This is part of a card making piece I used, a little girl holding a cute little polar bear. The kit also comes with a sheet of background paper so I cut a tag for the background. I then layered the images on, you have to use a bit of foam tape to make them dimensional but I didn't use too thick a tape because I wanted the acetate piece to fit over top and not be too bulky. I inked the edges with some blue ink on my blending tool then I took the top acetate embossed piece and adhered it all around the edges with glossy accents. Then when it was adhered I then placed my little sign and positioned it first where I wanted it. I punched 2 holes on the card and on either side of the little sign with my 1/8th inch hole punch, adhered the sign with some little bronze brads and that was it. Again simple but so cute. I thought about finding a bit of snow somewhere in my stash but must be down in the basement. Would have been cute to make an almost shaker like tag, hmmmmm might have to work on a shaker for next year.
Anyways hope you like it and come back again tomorrow for my last tag.
I am so glad some of you have commented and sad to see the end but hey all good things must come to ane end.
And......I have decided to give all 12 tags to the winner and I am going to make up a second goody prize for the runner up. Some items for you to make your own tags.
So keep commenting and see you tomorrow......
L

Saturday, December 11, 2010

12 Tags of Christmas-#10

Wow I can't believe only 2 more tags to go.
Well this tag I will direct you to this link here at Gingersnap Creations for a tutorital on painting with bleach. I read this last night and thought I need to try this. I had to chop off the snowman's scarf off a bit but I didn't have to cut too much off and.... I have another snowman I can add to another Christmas card. This is so neat, simple and yet so effective. I did things a bit differently but managed the same effect.
Instead of swiping the ink pad on your paper I took my ink blending tool for a softer background with less streaks and got a nice soft blue background. I took some fun foam snowflakes and put just a bit of glue stick glue on them, put them on my acrylic block and used them as my stamps. I love using fun foam for stamps, just make sure you clean up after you are done and do this in a well ventilated area.

And I coloured my snowman scarf and hat with pencil crayons and for a bit of 3-D from my painting techniques I just put a tiny bit of light blue pencil crayon that actually matched the Broken China very well and just did a shadow around the one side of the snowman, around his buttons, under his arms and nose. Then I hit the branches and top of his nose and on his buttons with a bit of white gel pen. Added some silver ribbon at the bottom, a dark blue fun foam snowflake with a gem in the center and a little tinsel looking ribbon at top.
Make sure you read the tut over at Gingersnap Creations. Follow the directions and you will be so amazed at how well this turns out. I did it so can you.
Thanks for dropping by.
L


Friday, December 10, 2010

Inkurable Stampers One Layer Wonder

Well I wanted to get more involved in challenges and when I saw this challenge over at Inkurable Stampers I said yikes, this means no embellies, not second layers, no flowers no nothing. So.....after creating a tag I was doing with many layers of paper involved I thought what can I possibley do to make it one layer.
So this is what I came up with.

I first measured the front panel of  my greeting card and using my paper cutter I cut the size, then I measured a width to make a border evenly around the edges. I drew lines then cut out the middle part of the cardstock so I had what would look like  matting for a picture. I then applied some repositional glue on the backside around the edges of the opening and let it try. I then applied it to the front of the card and made sure the top pieces was down well for my next step.
I stamped with a Hero Arts Old French Writing stamp in VersaMagic Jumbo Java ink. I made sure I applied enough pressure on the stamp in order for it to stamp right up to the edges of the opening top piece.  I then stamped my bird stamp, Inkadinkado birds on branches stamp in Black Soot DI and embossed it also with black EP.  I then stamped my holly leaves in black ink and wiped off the  black ink on  the berries on the stamp because I wanted them to be really red.  I used 3 colours of pastels for around the edges,  leaving my top piece of paper on til the pastel part is complete. I scribbled in different areas around the opening close to the edge with a lime green, leaf green and a red pastel. I used a different finger between colours so they  pastels don't get all muddy,  I rubbed and smooshed the colours and blended the hard edges to soften them and blended into the next colour beside it. I then wiped most of it carefully away with a tissue so the paper is actually stained with the colours of the pastels. I then removed my window piece.  I then took some pencil crayons and coloured in the holly leaves and I used a Sharpie red marker to really make the berries stand out. I also added a bit of grey pastel to the right side of each bird to give them a 3-dimension look. I took a black sharpie fine tip marker to go over the stamped holly leaves and circle the berries and a white gel pen to line the top of the branches for a bit of snow.
That is it, my one layer wonder. Hope Sarah and the gang over at Inkurable Stampers like it.
Til next time....Falalala


PS the actually real card looks much brighter than it is here. Darn computers :)

12 Tags of Christmas-#9

Wow Tag 9 already......Yikes this means Christmas is drawing near real fast.
This tag I like, it is simple yet very festive, as you can see I really like the colour green.
I distressed the tag using Vintage Photo DI and inked the edges as well. I stamped the background using Studio G holiday Falala stamp in a Rhubarb ink. I tore a bit of music hymnal music and inked the edges as well with VP ink. The tree is a grungeboard from a collection of Tim Holtz, I paitned the tree in green acrylic paint then added a bit of Decoart textured snow. Let dry.
I found some green ribbon again in a stash of mine, I am starting to think I am a hoarder, and I took a flip top off of a can and used it as a belt buckle. I had seen this done before and once I did it here I thought that looked kind of cute.
The image is free from Flickr and I bordered it with some Starform glittery irridescent peel and stick border. Love that stuff it comes in all colours and widths.
That is it my friends.
2 tags today but separate posts so you can keep commenting and another post yet to show you my Inkurable Stampers entry for December.

I will be back on track tomorrow....stay tuned

12 Tags of Christmas-#8

I appologize for not doing a tag yesterday, again got busy, hockey game last night and I was wanting to get up early to go shopping before a mad rush this morning.

So here we go with tag #8...
This tag I started out with a piece of tan cardstock and covered it with torn bits of paper and used gel medium to adhere and overlap all the bits down, let the gel medium dry,Then I painted a very light coat of white acrylic paint to cover the paper but allowing you to see all the little different papers I used.. I let it dry completely before continuing on.  I then stamped and embossed using black EP to do the birds. On the edges of the tag I scribbled a leaf green, lime green and sort of a Christmas red oil pastels in variations on the edges only then using a different finger or clean the same finger between colours start smudging and moving the colours around and blend the hard edges together so one colour goes into the next. Then if you are still not happy take a tissue and rub a bit off or just leave it, if you want more colour just scribble a bit of that colour and rub again. I then took a piece of cardstock that I had made a flourish from my CB and used the cut out piece as a stencil and took my red pastel and smooshed it in and around the stencil part. I didn't lift it off until I was happy where the colour was and tried not to have too many hard edges but when I did lift it off I was careful not to rub again distorting the flourish. The next thing I did was set the pastels by spraying some hairspray on it and it kind of seals the pastels and it won't rub off if you put it away for keeps or storage. Learned that trick from Jenxo. Then I still needed something so I added little hats to each bird as they are having a wonderful festive party all lined up on their branch and I put Stickles on their little pompons. I added a bit of white gel pen along the top of the branches for a bit of dimension and I also (forgot to mention above)put a bit of gray pastel to the  right of each bird to make it look like they are 3-D. I then added a little string of bulbs I have had in my stash for something and thought the tag needed something else so I strung up some lights for them and a few punched out flowers with some pearls.
That is it. A lot of wind to explain that one but it was rather easy just some time waiting for it to dry. This gave me an idea for the Inkurable Stampers Challenge for this month's theme so I will be posting a card I made after I post my next tag.
I am reading everyone's comments and I am so glad you are enjoying my take on the tags and hope to inspire you to make some with what you have.
PS I have not forgotten the fibers it is just easier to scan. All tags will be completed with fibers or ribbon.
Thanks for dropping by and keep commenting, the tags are winding down now....L


Wednesday, December 8, 2010

12 tags of Christmas-#7 and a Gingersnap entry

Well today I am going to kill 2 birds with one stone as they say. I saw a challenge over at Gingersnap Creations a few days ago and what better way to make a tag for this challenge and make it one of my 12 tags.
So the theme GC81: Chestnut Theme Challenge - is Snowpeople .
This tag took a bit of doing but turned out so cute. I love these snowmen in their globe and they just make me smile. I love snowmen, some peeps like Santas some like angels, some like gingerbread but I really like snowmen. When I first saw these stamps I had to break the bank and get it. I have had this a couple years now but I use it quite a bit for cards etc and I have some single snow peeps by the same designer.
This is a Canadian company called Sunshine Designs but you cannot buy from their site, you must find a retailer who sells them. I bought my locally.
Back to the tag.... I stamped the image on Watercolour paper with Black StazOn ink. I then used Watercolour pencils and waterbrush to colour my images with. I cut out the image and just ran a black ink pad around the edges, learned to do that trick after cutting images out from InkStains by Roni. I cut a shipping tag shape out of this great holiday BoBunny scrap paper. It is two sided and had purple swirls on the back so I cut a few strips with decorative scissors and put a little trim at the top and bottom of the tag. Still needs something......I found a strip of sticky backed snowflakes in my stash and cut some to fit the top and bottom just for a bit of filler and eye candy. Oh and I also inked the edges of the tag before placing the snowglobe on with Dusty Concord DI. I then took a Studio G clear stamp and stamped Friends in the same ink on a scrap of WC paper inked the edges then attached the globe and the Friends sign with some foam tape to raise them off the tag a bit. I added some.......you guessed it ....Stickles to the large dots on the bottom of the globe and added some white fiber and that was it.
So a bit different than distressing but I like how it turned out. Thanks for dropping by again and hope to hear from you soon. I see a couple peeps are commenting every day, so.....keep up girls.
Til next time......create with what you have.


2 posts tonight-#1

This first post is to show you some Christmas gifties that I have made and I know I am so addicted to these little pockets my friend Jenxo made a few days ago. Although I didn't do exactly what she did but I did for the most part most of it. I struggle with doing lacey frilly stuff and hers are so beautiful but I changed up mine a bit to be more festive for the season.
Sometimes I like to give someone a little something just to say Merry Christmas and it doesn't mean I am expecting a gift back, I seem to have inherited a trait from my mother about Giving. I love to make and give things so I just may be sending a few of these out and although they may reach destinations a little late it still would be nice to get a little something from Santa even a week or so after the holidays.
So here are some pockets that I hope you will enjoy. I used some scraps of prepped canvas I had from making my stockings so they came in handy for the back part of the pockets and the front I used scraps of paper from cardmaking and I actually covered up the stitching but that's ok. I lucked out and found some sparlky chenille ( I call them pipe cleaners still) at the dollar store in lovely colours. I used inks on some of these and the Santa my fav has some pastels. Take a look over at the loverly Jen's blog, she has some great Christmas ideas and very easy to make. I like easy and quick this time of year. I stuffed these with a few little choccies and a candy cane. They look so cute hanging on the tree. Thanks for sharing that tut Jenxo.


 And below I have a CD calendar that I saw on another blog and thought hey, they would make a great gift.
I made 2 of these but not the same for some male family members and they are both going to Formula 1 in Britain this next coming year. Here is the link to get all the info you need.
I didn't have a stamp for the checkerboard background so I made my own out of fun foam. I cut thin strips then cut little squares from the strips. I added glue stick glue all over the surface of my acrylic stamp block then started spacing my little foam squares til I had the number I needed to create a checkered pattern. I stamped away the top part to break up the white cardstock I used. I got the images from a few websites and then just printed the pics off on glossy photo paper. Once I had an idea what I wanted to make it all when quite quickly. The most time was cutting out each month and making sure it all matched up to fit inside the CD Case. The stand is easy to do as well. It will tell you all you need to know at the site but you open the case up take it apart  turn one piece of the case around so you have a little lip at the bottom and snap it back to where it was originally only flipped. The calendar sits on an angle and the fits nicely on a workstation or desk.
I hope these guys really like them. I am actually quite proud how they turned out. Wish I had more time I would have done a lot more but I am on the countdown now for shopping , cards I haven't even sent out, too busy making cards for gifts and so on.
Well that is it for this post. I am off to post my next tag for the 12 tags of Christmas.
Thanks for dropping by.

Tuesday, December 7, 2010

12 Tags of Christmas #6


So sorry I am late posting tonight but we were invited out for dinner then when we got home we had to get the woodstove going as it is really chilly this evening and going to dip a bit more tonight.
I didn't get a chance to put some fiber on this tag yet but no fear it will be done.
On this tag I did some distressing again with Peeled Paint and a tiny bit of Broken China, love the 2 colour combos. I inked the edge of the tag with Peeled Paint.
I cut a tree from again Tim Holtz Alteration Die then ran the tree through my Cuttlebug to get tiny dots all over it. Then not sure I like it looking at it again but I just lightly touched the tree with ColourBox white ink and I did it lightly down the side. I think I might touch it up with my texture snow instead the white looks more green here to me.
Like many of my images I searched on FlickR and got this great one with a girl dressed in red and her two pets. Then I took some fun foam letters that were blue yellow and I think pink and painted them with Tomato Spice Delta acrylic paint. Let it dry then I put my stylus in white paint and made dots all over the letters after they were dry. I added a bit of Diamond Stickles again for some bling  then added a bit of ricrac from my stash that my friend Jenxo sent me some time ago and that was it. Easy Peasy.
I am so happy some of you are enjoying my tags. They are fun and each one turns out different.

Tomorrow's tag is going to be just a bit different and not really into grunge or distressing but on a watercolour side of things. Stay tuned and don't forget to post. I know a couple peeps that are posting daily and you have a chance to win one if you keep posting every day.
I don't pretend to be Tim Holtz, yes I have some of the Ranger products but I say, do what you feel is right for you and what you can afford. Think outside the box and just go for it.
Art is what you make it and this is what I enjoy.
Thanks for dropping by and hope to see you back soon.
L

Monday, December 6, 2010

12 Tags of Christmas- #5

Here is my little tag titled " Believe".
I have distressed my tag with none other than DI in Fired Brick, then I tore a piece of scrapbook paper that had the word Believe and I inked the edges of the torn piece then after I applied it to the tag I added some Stickles to the lettering enhancing the red and for a bit of bling. I also stamped in a light touch of black the flourishes just to fill the background.
At the top you will see some holly leaves and berries, that is the grungeboard that I have mentioned a few times here from a Tim Holtz collection of sheets I purchased last year. It had some Halloween items, snowflakes, letters etc. The grungeboard I painted using Peeled paint DI with a dampened paintbrush and did the berries in Fired Brick as well and added stickles to the berries.
I made a stencil for the numbers 25 and used my blending tool in the same ink and just moved the tool around until the 25 appeared  lifted the stencil off and good to go for next time. I didn't do it too dark but wanted it to be there in the background. I added a bottlecap and coloured it with a permanent black marker (after it was smashed to flatten the bottlecap) and added my vintage Santa and punched it with a 1 inch round punch. I added a bit of GA (Glossy Accents) to the surface of Santa. I attached the bottlecap with GA as this stuff really sticks well!!!
And that is pretty much it. Simple yet very jolly indeed and I believe a small part of us still " BELIEVE" in Santa.
Thanks for dropping by and tomorrow I am going to post twice as I will be sharing some "Handmade" Christmas presents. I won't be saying who they are for but just some ideas in case you get the itch to make some handmades.
Don't forget to post now....I am watching to see how often you do post so you have a chance to win a tag of your choice and maybe a little extra goodie as I am feeling very festive.


Sharing a link

Just in case any of you bloggers are wanting the vintage tickets (and tags are available as well) I used yesterday on my tag here is the link. There are many freebies here so make sure you check them out. All free.
I would recommend you print them off on a cardstock so they have a bit of stability to them.
Run the scissors along the edge for a tattered look then ink the edges.
Enjoy, I will be posting another tag today but probably after the hockey game.
Stay tuned everyone.
Lesley
Love reading your comments, thanks so much. I am not even close to Tim's level but I like doing my own thing and I am glad you like it as well.

Sunday, December 5, 2010

12 Tags of Christmas-#4

Well another tag to show you. This one is not too difficult to make and a little different than distressing. On this tag I used some nice scrap paper and just cut the same size like the shipping tags. The ornament is a grungeboard cut out from a Tim Holtz collection and I covered it with this nice vintage lady. If you click on the image you will notice the colouring of her, I didn't touch it up at all. I painted the stem on the ornie with a touch of gold acryllic paint and added a ribbon from my stash. I then printed off a Miss Cutie Pie free holiday ticket sheet I downloaded last year and ran my scissors along the edge of the ticket to distress the paper a bit, ran my Java inkpad over it. Before I added the lace to the bottom I just quickly hand stitched the little red beads on. Thanks to my Mum I am using up all kinds of lace these days. I added a bit of fiber at the top  but it is too white here so must find some off white which will only improve the vintage feel. Funny how you see things a bit differently on the screen after they are complete.

Thanks again for stopping by. I hope you enjoy my own version of Christmas tags.
I know a lot of us don't have the fancy dies and things Tim Holtz uses so why not do your own bit of creativity.

Oh and a bit of good news for me.......I have found out I won some blog candy again over at InkStains with Roni. A while back she posted some bamboo tiles and if you left a comment you had the chance to win something and I found out yesterday I won.
Wow for someone who doesn't win much I have won a couple things online now. So never say never and keep posting comments, you never know you may win something, even here!!!!
Stay tuned for Tag #5.

Saturday, December 4, 2010

12 tags of Christmas-Day 3

Sorry I missed posting yesterday but it's been kind of busy with me doing a mostly Handmade Christmas this time of year. I got lost in doing some things then it go too late to post. I do require sleep for some reason.

Here is my 3rd tag to share with you. As I see I only have a few comments from Tag #2, don't forget if you comment each time I post a new tag you have a  better chance to win a tag of your choice but you must post as often as you can.
Perhaps you may not be interested either and that is ok too. Just thought it would be a nice little giveaway as I am feeling like giving back and " tis the season to be jolly" I say.

This tag was distressed using Peeled Paint. After it was dry I inked the edges again with the same ink. I tore some music page and inked it as well. I then used this wonderful green cardstock in my stash and cut it out on the CB using Tim Holtz Alterations die. I added some textured snow that had glitter in it and just put snow on the one side of the tree and then added some green and red gems. The numbers are Grunge board numbers from a Tim Holtz grungeboard pack, inked in Fired Brick  then  I added some Diamond Stickles.
I can't remember the company name of the Christmas Tree stamp but again from my stash of many stamp collections that seems to be growing.
And that is it, a simple yet fun tag.
Thanks for dropping by.
If you would like to show me any of your Christmas tags I would love to see them.
Just put a link in your comment or email me with Christmas tag in the subject line.
Night night.
L

Oh and for a great little nifty gift idea to tuck away a few little candies go to my friend's blog, Jenxo in Australia and check these out. I just had to make some they are a lot of fun and a great way to use up scraps and you can make them to hang on a tree.

Thursday, December 2, 2010

Lesley's 12 tags of Christmas-Day 2

Hello again, this is the continuation of my 12 tags of Christmas and today I am showing one of my favourite techniques. If you recall I did a tutorial on Inkjet Transfer then you will really like this tag and I encourage you to try this, even on a small tag.
I must stress in this tutorial the key is to be patient and allow your image to dry completely before trying to remove the backing paper. Also reverse your image before printing so that when it goes onto the tag it will be correct, or if you like don't reverse the image and you will get a flip result. No rules to art just reminders in case you get frustrated.
Ok here it is, I did the distress technique on my shipping tag using Broken China DI. Then I hit it with the heat gun to dry the tag. Then I found a nice vintage image from FlickR, resized it to fit on the tag. I used a good amount of Gel Medium and applied it to the tag and then put my image face down onto the gel area, be sure to use plenty of gel. It will dry so not worries about having too much. I do NOT recomment putting it directly onto the image itself as it may cause the inks to start to bleed so just press your image onto the gel, brayer it or smooth it out with your fingers and make sure all edges are secured.
LET IT DRY. Do several at one time or do some more tags or have a cup of tea.
I do NOT recommend a heat gun either , I tried that but it does not ensure that the image in all areas are completely dry and when you have to add water to the back of the image, it may roll right off the paper in spots and then you become frustrated. These are just things I learned along the way so just be patient.
I have also used Modge Podge for paper and it works as well. LET IT COMPLETELY DRY!!!!!
Ok your image is dry, now the fun part. Get a little dish and dampen our fingers and the back of the paper, you will start to see the image appear. Roll your fingers around starting in the center. DO NOT start on the edges but in the center. Keep rolling and brushing away the bits of backing from the paper. Keep doing this and follow the tutorial with pics in the link I provided at the top of this post.
Ok now let the image dry and you can work around it. I printed off a verse for my tag, inked the edges with my same DI Broken China . I found some fun foam snowflakes and added some Diamond Stickles. Then I used some Starform translucent border, this stuff is great, it is repositionable so if it doesn't go quite where you want it you just carefully lift it off the paper and no tearing. Just smooth it down with your fingers after you get it where you want it. I bordered all around the image.
Ok now for one final little detail I did on this. The inkjet tranfers are sometimes a little faded so I took some pencil crayons and just lightly coloured back in the coats on the children and the leggings or pants. I even added a bit of pink to their cheeks. Make sure again your image is completely dry before coloring.
Then I added my snowflakes, ripped a bit of music paper and inked the edges added some blue fiber, oh and I added some snowflakes with my stylus dipped in white acrylic paint and that was it. I really like how this one turned out. Just may have to do another one of these or similar.
Ok everyone, remember leave a comment each tag post and I will be keeping track.
Thanks for dropping by and stay tuned for Day 3 of Lesley's 12 tags of Christmas


Wednesday, December 1, 2010

Lesley's 12 tags of Christmas-Day 1

Hello blogger friends. I am happy to say we got snow today and well as sloppy as it was it came down in big fat flakes and covered everything in sight even after a day of rain yesterday and thru the night.

I have been inspired by the infamous Tim Holtz to do my own version of the 12 tags of Christmas and I hope you will stop by each day to see what I have come up with.
Now what I will be doing is not necessarily giving you photo tutorials but an explanation of some of the things I did to achieve the tag in hopes that they may spark some of your own tags or card making ideas for the upcoming Christmas Season.
And......if you stop by every day and post after each tag, the one with the most posts (you can only post once each day) you could be the winner of a tag of your choice and if you tell a friend to stop by and she mentions your name that will be an added spot and your friend or friends have a chance to win as well. So drop by and see what I am coming up with for the 12 tags of Christmas.
Here we go..Tag #1
This one I call Fa la la, I have taken a tan coloured piece of cardstock and embossed it with this new folder called Musical Notes by Crafts-too in my CB. I then inked the raised area of the music notes with Versa Magic Jumbo Java inkpad and around the edges of the tag. I then tore a piece of small scrap music and inked the edges in the same ink and applied it with Aleene's glue to the mid point of the tag. The bird is from K&C company, Tim Coffey Blossom Wood Collection and glued it on. The scroll is from a grungeboard lantern but I cut the lantern off and wanted the scroll and painted it in Delta 14K gold Gleams. I then quilled my mini roses (boy was I out of practise on those) in burgundy and ivory 1/8" precut strips, and punched out my ferns. I applied a bit of Diamond Stickles to the roses only for a bit of sparkle and attached to tag on opposite corners. The Fa la la was a Studio G stamp stamped in a nice burgundy colour and the round circle was from a rinchie punch I had, inked the edges in Jumbo Java and attached the little tag with gold metallic jewellry trim.  I added a bit of fabric at the top for hanging in a mocha colour to match the colours. That is it. Sounds like a lot of work but I used some bits I had and did some quilling and I really like how it overall turned out.
Hope you like Tag #1 and don't forget to post your comment.
Thanks for dropping by.
L 
Related Posts Plugin for WordPress, Blogger...