Sunday, December 9, 2012

paper circles and buttons...oh my

Well I have you guessing and I bet you still don't know what I am talking about.
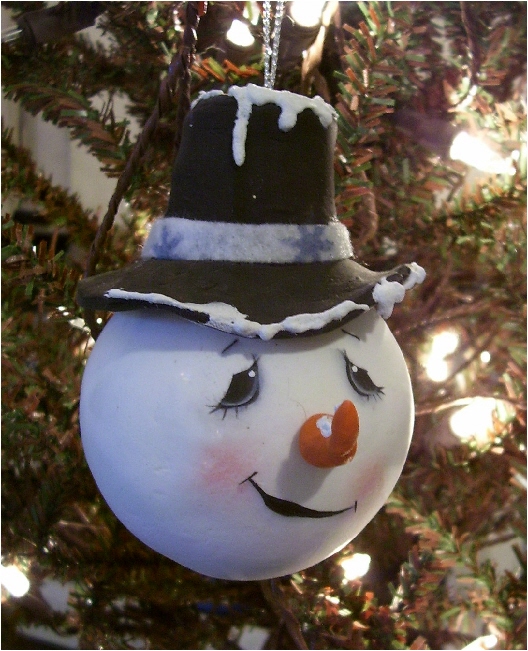
I thought of this after receiving a wonderful ornament swap from my friend Cathy over at TolenTreasures blog. Cathy is a very talented lady and can tackle almost any task. She makes beautiful penny rug runners and  ornaments and I thought well why not make some out of paper. Although there is no sewing at all involved but I thought how cute would these look tied to a Christmas gift or a few on a simple country Christmas card. This is just how I made mine and I wanted to share how easy and fun they are, and, a good way to use up those scraps you hate to throw out.

What you need, scraps of paper, ink pad but not necessary, scissors, a fine tip black marker, I used paper buttons because I have a die I use in my Cuttlebug but you could use real buttons or some other embellishment, a hole punch if tying to a gift and some string.

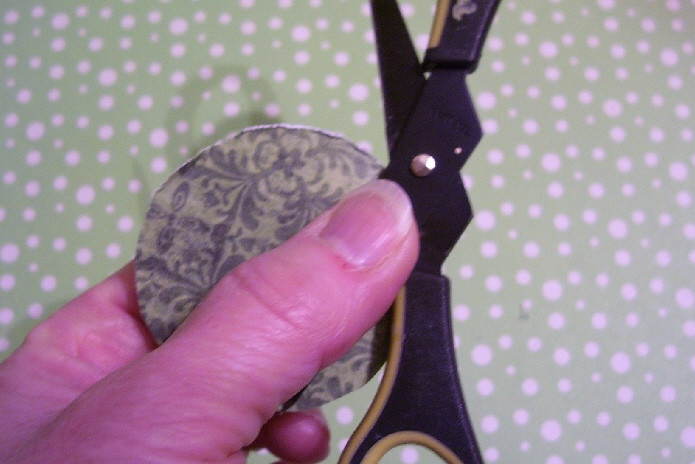
I used containers to make my circles and traced around them on my scrap pieces of paper and cut out. 
 If you want to ink your edges of the circles do so now, I forgot to take a pic but you know how to do that then take the scissors, open them up and run the inside of them on the edges of your circles to distress the paper but not tear it. I like how it almost gives the look of fabric to the paper..do this to all your circles.
 Now take your fine tip Sharpie black marker and do a faux blanket stitch all round the circle. I came in just a bit from the edge so it looks like it has been sewn. Do this to all circles.
 Next, glue small circle to large the add your button. So fun and easy and don't they look so cute. Some of the buttons I put off to the side a bit on the inner circle to make it look a little more handmade and not so perfect.
 Then I decided to make a few tags and added To and From on the back, I will punch a hole and add a bit of bakers twine and add to my gifts. As mentioned above you could make these a bit smaller and make a lovely card. Don't limit yourself to Christmas, make any occasion with different types of card stock. I will add that the heavier card stock I like the best especially when distressing with the scissors. 
Have fun and hope you enjoyed this little paper penny tutorial. Fast easy and oh so cute.
TTFN ♥♥♥

Friday, December 7, 2012

A quick and easy ornament

Well I finally got the pictures taken and a few minutes to show you how to make these cute and easy ornaments.
What you will need is some snowflakes, I got mine at Dollar Tree (yeah Canada now has Dollar Trees), these came 10 in a pack and they have glitter on them but there are several varieties to choose from.
You will need scissors, a circle punch, mine is 1", hot glue gun, vintage or even small images from past Christmas cards, a strip of 12 x1 inch paper strip and a small square for the back of the rosette you will be making from the strip. 
 Take the 12x1 inch strip of paper ink the edges  and  then score it every 1/4 inch, then accordion fold it to the end. Attach the ends together making sure your valley folds and peak folds line up the glue in place. 
 Now press the circle down and push it in to form a rosette like shown below, you actually need 3 hands at this point but don't get discouraged it is well worth it in the end.
 The side you want face up on your snowflake lay face down for now. Get your square piece of paper and hot glue gun. Made sure you work on a surface that you won't damage with hot glue, a non stick mat or whatever you are using. Squirt some glue down into the hole then quickly take that square piece and place it over the hole. This will help keep the rosette together. I usually have my hand on the rosette but this was all done so I could take the picture to show you how it looks on the back side.
 Flip over and now you have a rosette. Vintage looking isn't it...now for the fun part.
 Add some hot glue to the piece of square paper on the back, stick to the center of the snowflake. Add your image to the top and any more little embellishments you like. These images are found around the net copyright free. Make sure your hanger is at the top before gluing everything in place.
I have done a few of these with little children's faces from Magic Moonlight site and some from FlickR etc. Use your children's faces, pictures from old photos, old postcards, past Christmas cards with tiny images. Add to packages or hang on the tree. Ornament exchanges, swaps etc. So easy and even the kids could help. How easy and frugal and they look so nice. 
Good craft show sellers as well, believe me they sold!!!
Enjoy.


  And this 8x10 canvas I taught a class at my community library on Thursday night during the 12 weeks of Christmas craft nights. It was inspired by the talented mixed media artist Christy Thomlinson and we had a blast. The girls really enjoyed this and we used, paints, stencilling, text pages, scraps of Christmas papers, water colour crayons and fonts from the computer. Each girl used different papers and loved using sequin waste for the first time and were amazed at how easy and effective this was. I even gave them an extra canvas to take home and make another on. It was a small class and we had a blast. A good time was had by us all. 

Thanks for dropping by....... and what can one do with paper circles and paper buttons?....
Stay tuned for our next Christmas quick tutorial. 
♥♥♥

Tuesday, December 4, 2012

Paper rears it's head

I didn't say ugly either. I have really missed playing with paper and this time of year I especially love creating cards and tags to top presents and to add to little things I send out.
Today after helping at the retirement home luncheon, I thought it would be nice to start a few things. I am sending out painted ornaments to the girls on our Friendly Palette group. We exchange ornaments yearly and we are building up quite a collection of each others little works of art. It's fun seeing what we come up with each year.
I decided on making some tags to go along with mine and I still need to add a bit of ribbon but these I thought were really cute. I got some stickers from the dollar store that were kind of Primitive and rustic looking. I did the spray ink on my work mat and smooshed around the ink on the tags, added a circle of paint here and there and inked the edges of the tags and they were done. Cute and quick. I hope the girls like them. 


  And I made a couple of cards for some recipients, these are 3D cards,  you add  dimensional tape to raise parts of the image. I used gold glitter and some gold corners. I got the blank tag cards from Michael's, I really like the look of these. Good thing I bought 2 packages. These Santa's were purchased locally from Ecstasy Crafts which is just down the road, a much too convenient store but it has quality and European designs which you can't find just anywhere.

Well it has been a full day.
I must start my shopping this week and get that last order done before my customer calls in a panic. I need someone to cut the wood length for me and if I can nab him before he goes to work tomorrow afternoon we are good to go. 
Take care and just wanted to let you know I have made a Facebook page for Harmony Road Studio so you can follow my arty doins  there as well.
TTFN ♥♥♥

Monday, December 3, 2012

New snowie ornaments

Hey there everyone. I am still doing some crafty things but not for shows. I am making a few little gifties for peeps I like to give a little something to. Since my Styrofoam head snowies all sold I decided to make a few more but I used a larger ball and I added a hat. The ball is covered in air dry clay, hat and nose is also clay then painted and embellishments attached. They look so cute on the tree. Now I need to get a couple little boxes from the dollar store and add a little tag and a cute little gift is made. They will be nice to hang all winter long and not just for Christmas. I decided I need to make these next year and will likely get at them  sometime in the New Year. I have one more order to complete and I need to get my Friendly Palette girls their ornies out for our annual ornament swap. They made it to their envelopes today, now just to finish up another item to put inside. Lots to do and still shopping to be done....where does the time fly???
Til next time...Fa la la la la.....


♥♥♥

Saturday, December 1, 2012

A custom order

I painted this for a custom order I got at one of my craft shows. I did it in a couple of days, usually it takes me only a few hours but I am trying to give my back and shoulders a break so just a bit at a time and it seems  to be improving. This is a Terrye French design. The young lady that ordered it wanted something for her Mom for Christmas and she likes owls. I knew immediately what to do. I am just waiting to hear back from her to see if she wants a saying or a word at the top then I will seal this and add the hanger to it.  One more order to complete, then a Christmas gift to paint, can't show that one and some holiday goodies. Oh what fun it is to play.......
Thanks for dropping by
♥♥♥


Related Posts Plugin for WordPress, Blogger...